Contents
Description
- These step-by-step instructions will guide you through setting up and running a simple biotransport problem from scratch.
- This example models the diffusion of calcium in a cell in the presence of an immobilized buffer such as troponin C. Calcium flux across the cell membrane (the top and bottom edges of the mesh) is preset as a 20 ms inward-pulse followed by a time-varying outward flux that returns the system to initial conditions. The membrane currents approximate the activity of the L-type calcium channel and Na/Ca exchanger during an atrial myocyte action potential.
-
An automated script that runs this tutorial is included in the Continuity installation: examples\biotransport01\2D_ca_diffusion.py. To run it, click File→Read script→Python or session script
Start Continuity
- Launch the Continuity 6.3 Client
-
On the About Continuity 6.3 startup screen
-
check the Electrophysiology box under Use Modules:
-
-
Click OK to bring up the main window
Create Mesh
-
-
Select rectangular cartesian in the Global Coordinates: pop-up menu
-
Click OK to submit Coordinate Form
-
-
-
Choose Hermite Basis Function→2D→Cubic-Cubic with 2 integration/collocation points for Xi 1 and Xi 2
-
Click Add
-
Choose Lagrange Basis Function→2D→Linear-Linear with 2 integration/collocation points for Xi 1 and Xi 2i
-
Click Add
- Verify that the list of basis functions now contains:
- Cubic-Cubic Hermite 2*2
- Linear-Linear Lagrange 2*2
-
Click OK to submit Basis Form
-
-
-
Click Import/Export/Graph button to open Continuity Table Manager
-
Continuity Table Manager→File→Open…
-
Select tab-delimited nodes file (nodes.xls)
-
-
- You should now have nodes numbered 1-143
-
Verify that Linear-Linear Lagrange 2*2 are selected under Coordinate 1, Coordinate 2, and Coordinate 3
-
In the Field Vector 1 tab, verify that Linear-Linear Lagrange 2*2 is selected under Field Variable 1, Field Variable 2, and Field Variable 3
-
In the Field Vector 2 tab, verify Cubic-Cubic Hermite 2*2 is selected under Field Variable 4
-
Click OK to submit Node Form
-
-
-
Click Import/Export button to open Continuity Table Manager
-
Continuity Table Manager→File→Open…
-
Select tab-delimited elems file (elems.xls)
-
-
- You should now have elements numbered 1-120
-
Click OK to submit Element Form
-
Formulate Biotransport Problem
-
If the Electrophysiology menu is not loaded, select File→Load Continuity Modules…
-
Select electrophysiology and click OK
- The menu bar should now show the Electrophysiology command
-
-
Electrophysiology→Edit→Ionic Model…
-
In the Select Model tab, find EP_Ca_diffusion in the list of models, and select it.
-
Click on the Submit tab (the very last tab) and then click the Submit button
-
-
-
Click OpenMesh radio button
-
Click OK to change renderer
-
-
View→Set Divisions…
-
Enter 4 for Number of Divisions: and click OK
-
-
-
Click surfaces radio button
-
Click Render to display mesh surface
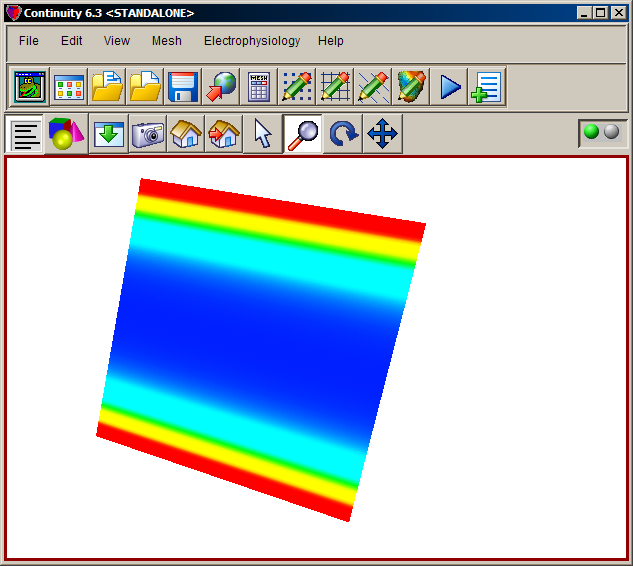
- The mesh should now look similar to the first screenshot on the top of this page. If the color seems washed out, try rotating the mesh a little bit (use the looped arrow button on the toolbar)
-
Compute and Render Solutions
-
Electrophysiology→Calculate→Constraints
-
Make sure the Automatically update constraints form from table checkbox is checked
-
Click OK
-
-
Electrophysiology→Solve→Integration
-
Set Duration to 80 (ms)
-
Set Step Size to 0.5 (ms)
-
Under Output tab, select Display solution every 5 steps
-
Click OK to start solving, and wait for it to complete before proceding
-
-
Electrophysiology→Render→Solution
-
Set End Frame to 32
-
Set the Min value to 0.0
-
Set Max value: to 50
-
Click OK to view an animated color map of intracellular Calcium concentrations (rendering the solution will take a few moments).
-
Pre-built model
This cont6 file contains all data and parameters before the Electrophysiology solve: bt_model.cont6

